How it works
Point → Lock → Range → Mark → Go
Every screen, in the order you meet them, from the moment you have an animal down to the moment you are standing over it.

photos/originals/tops-sunrise-pano.jpg
The two halves, in about a minute
Marking takes a few seconds. Recovering takes as long as the country makes it take. Both clips are sped up.
The geometry, in one picture
The phone knows where you are standing, which way it is pointing and how far it is tilted. Your rangefinder knows how far. Together they make a point instead of a line — and an honest zone around it.
How much ground you will be searching
The compass sets the size of the search, not the rangefinder. Double the range and the zone roughly doubles; a steadier compass reading shrinks it far more than a better rangefinder would.
Screen by screen
A tahr on the far face of a gully, ranged at 380 metres, nine degrees above you.
Home
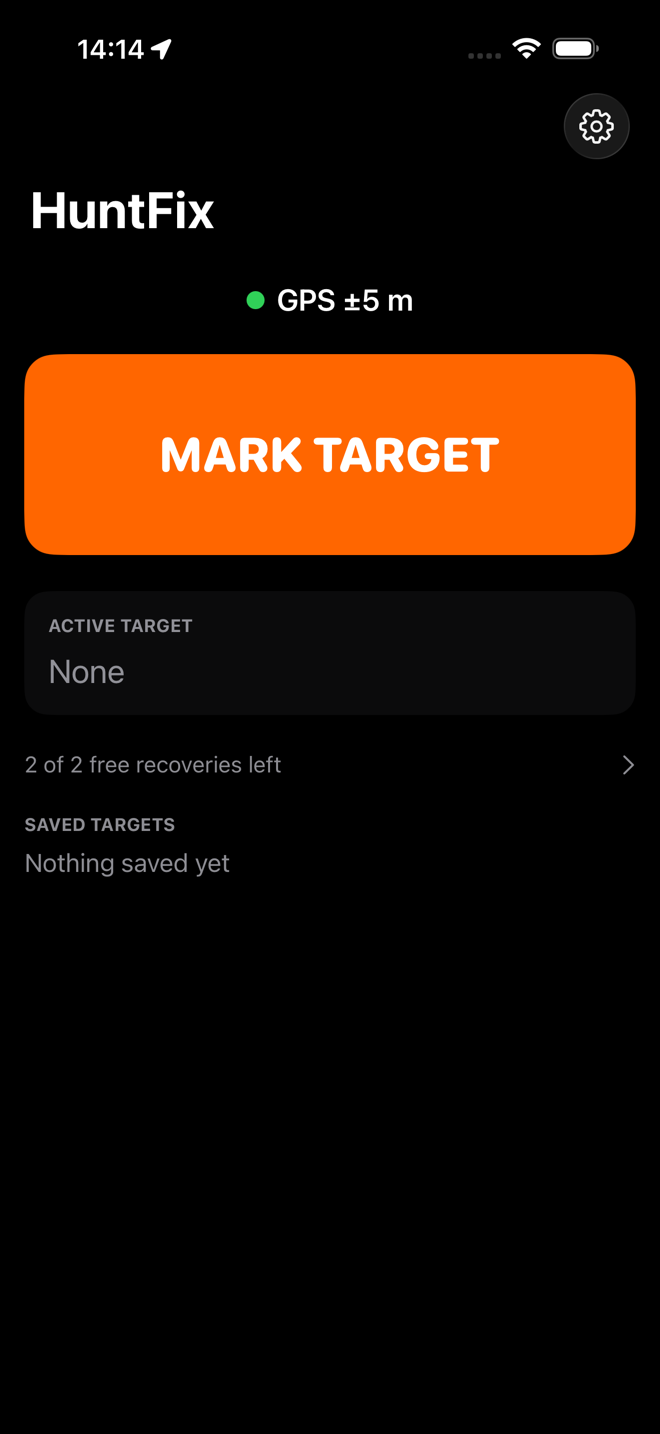
One screen, one decision. The GPS accuracy is at the top with a coloured dot, because that number is the floor under every other number the app will give you. MARK TARGET is the whole width of the screen and sits under your thumb.
Below it is the active target — the one animal you are currently recovering — and the list of everything you have marked before.
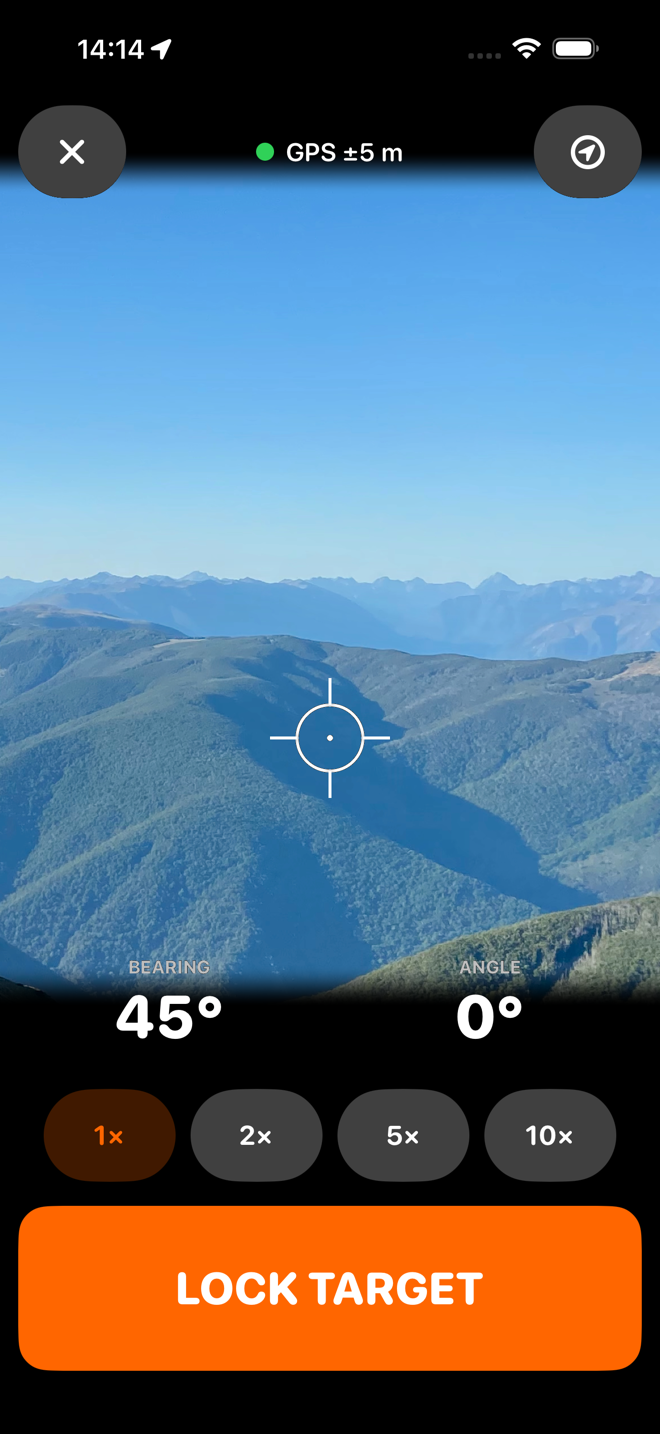
Sight
The camera fills the screen with a reticle in the middle. You put the reticle on the animal. Underneath, live, are the bearing the phone is holding and the elevation angle it is tilted at — each averaged over the last second, not the last instant.
Zoom runs 1×, 2×, 5× and 10×; the 5× reaches the telephoto lens optically. The crop is about the optical centre, so the reticle stays on the sight line whichever zoom you use.
The view through the camera on this screen and the next is one of my own photographs, dropped in behind the reticle. Every reading on them is the app's own.
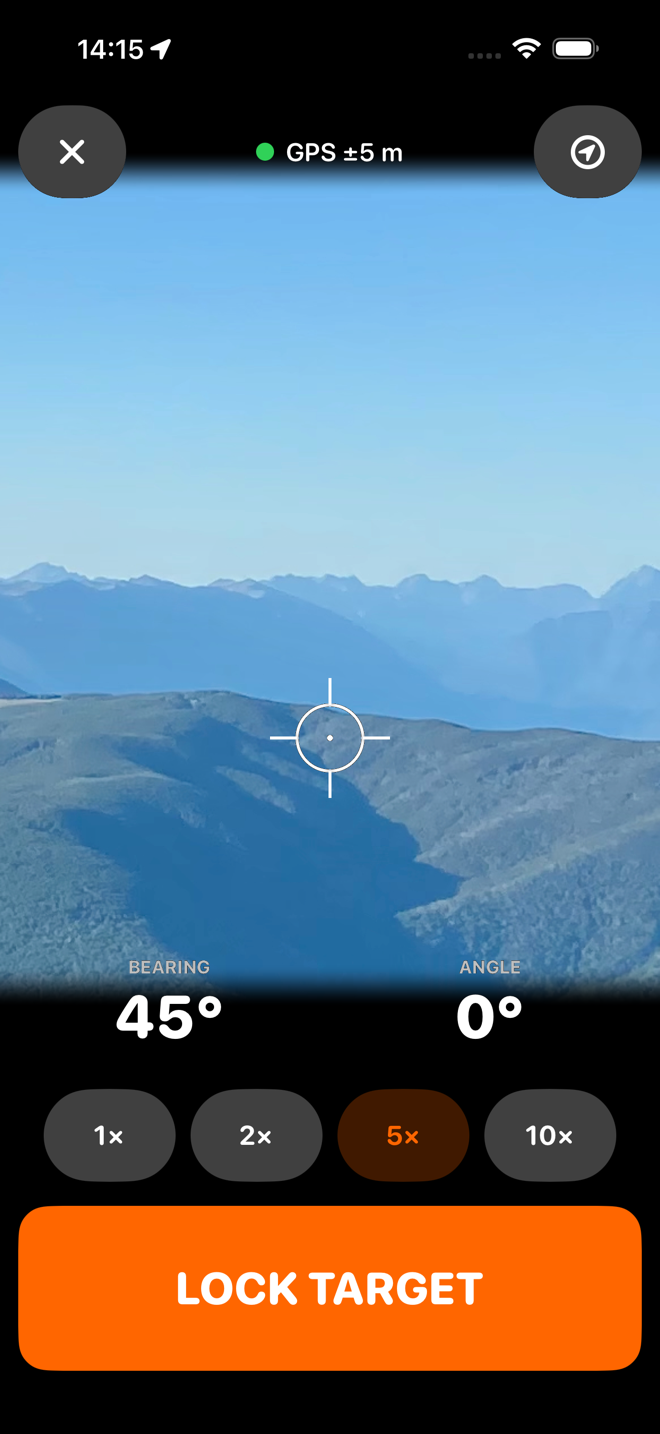
Zoom in, then lock
At a few hundred metres an animal is a few pixels at 1×. The zoom exists because a distant target proved genuinely unidentifiable without it.
LOCK TARGET takes the one-second mean of the bearing and the angle, records how confident the compass was and how much your hand moved, and freezes all of it with a heavy haptic. From this moment the measurement is fixed.
Warnings appear here when they apply: poor GPS, a compass the phone does not trust, an unsteady hold. None of them stops you locking. You are the one standing there.
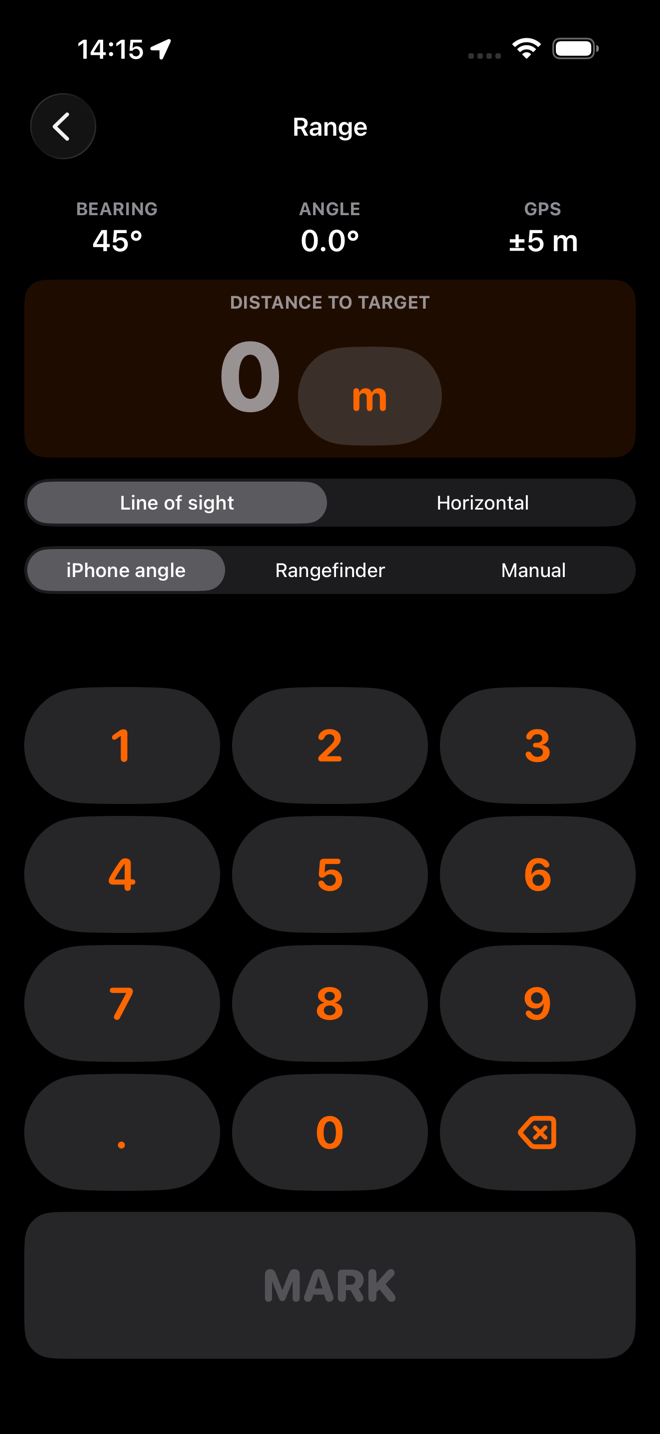
Range
Read the number off your rangefinder and type it in. The keypad is the app's own — big keys, no system keyboard, no autocorrect, usable with cold hands.
Two switches sit above it. Line of sight / Horizontal tells HuntFix whether your rangefinder has already corrected for the angle, so the correction is never applied twice. Angle from lets you use the phone's own angle, or one your rangefinder reported, or one you type. Both remember what you chose.
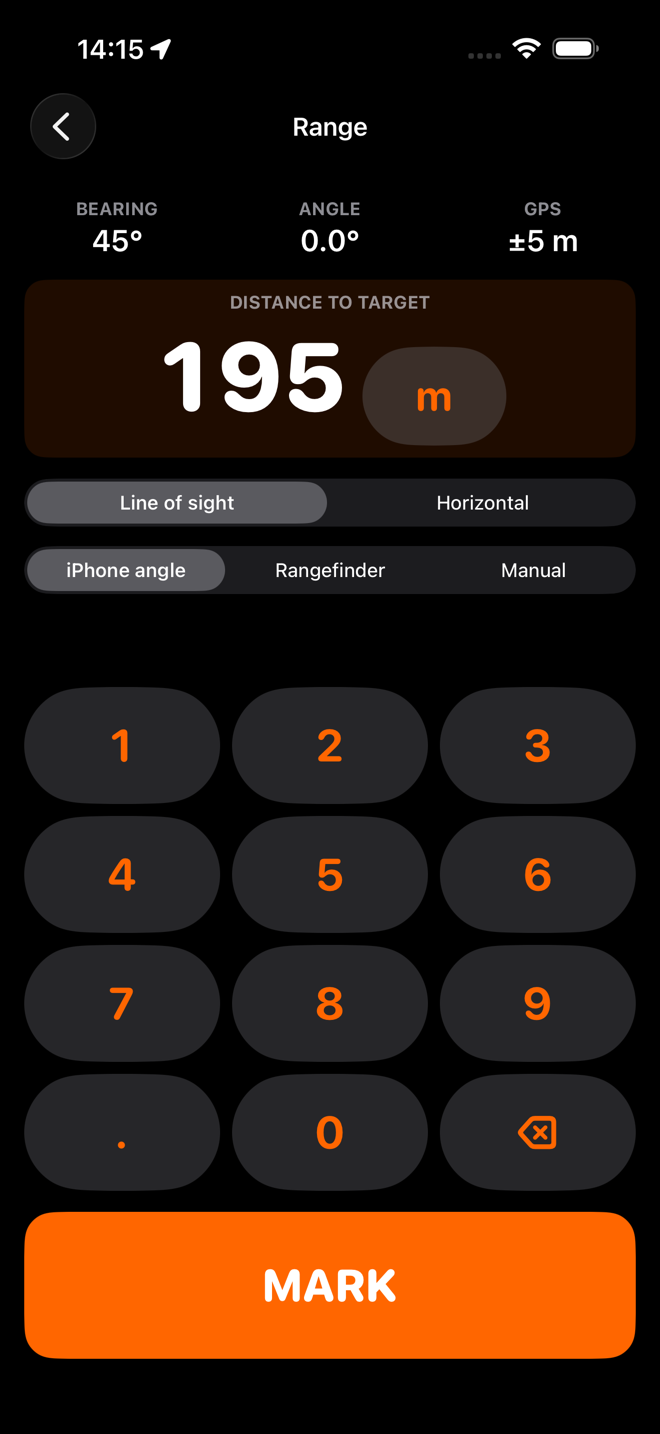
Mark
380 metres, line of sight, nine degrees up, angle from the phone. MARK solves the target: it turns the range and the angle into a horizontal component and a vertical one, then walks that horizontal distance out along the locked bearing across the WGS84 ellipsoid to get a latitude and a longitude, and adds the vertical component to your own altitude to get an elevation.
At the same time it carries your GPS error, the compass confidence, the angle confidence and the steadiness of your hold through the same maths, so the answer arrives with its own error bars already attached.
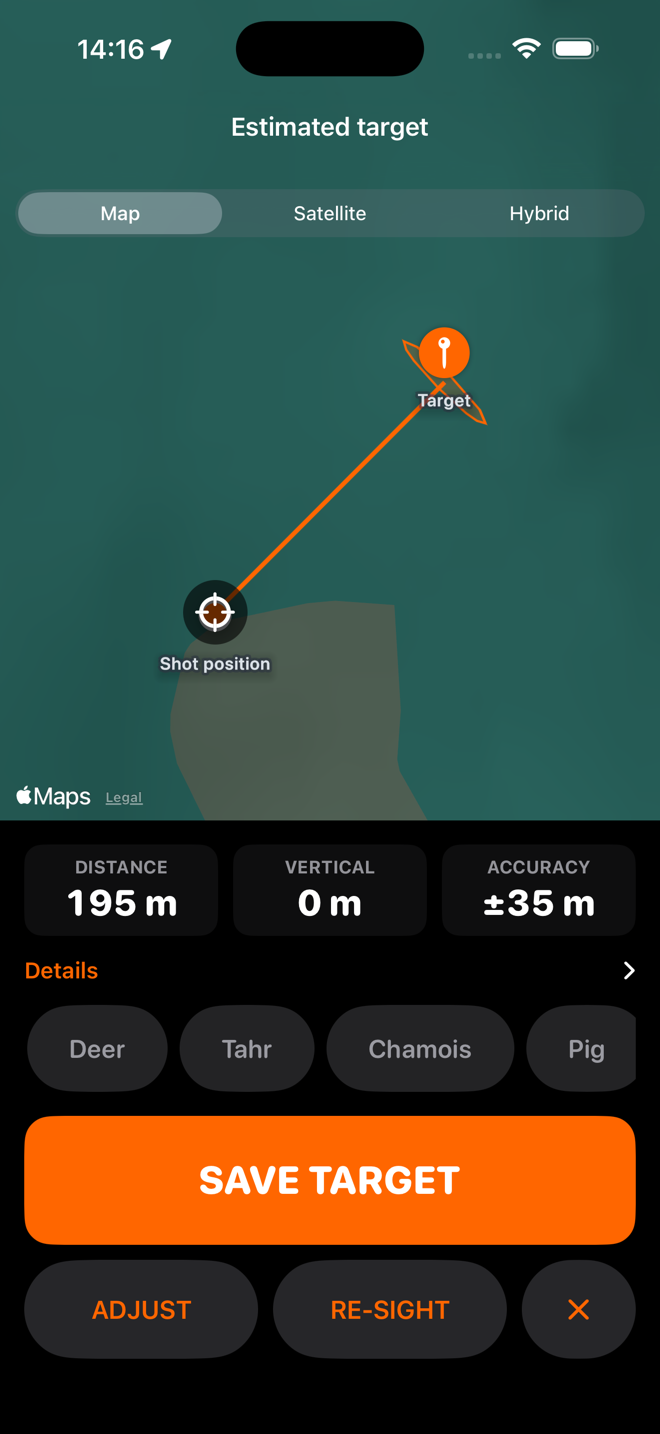
Look at it before you keep it
Your shot position, the target, the line between them, and the uncertainty drawn as an ellipse — wider across the line of sight than along it, because that is the shape a bearing error actually makes. A one-degree error at four hundred metres moves the target seven metres sideways and almost nothing nearer or further away.
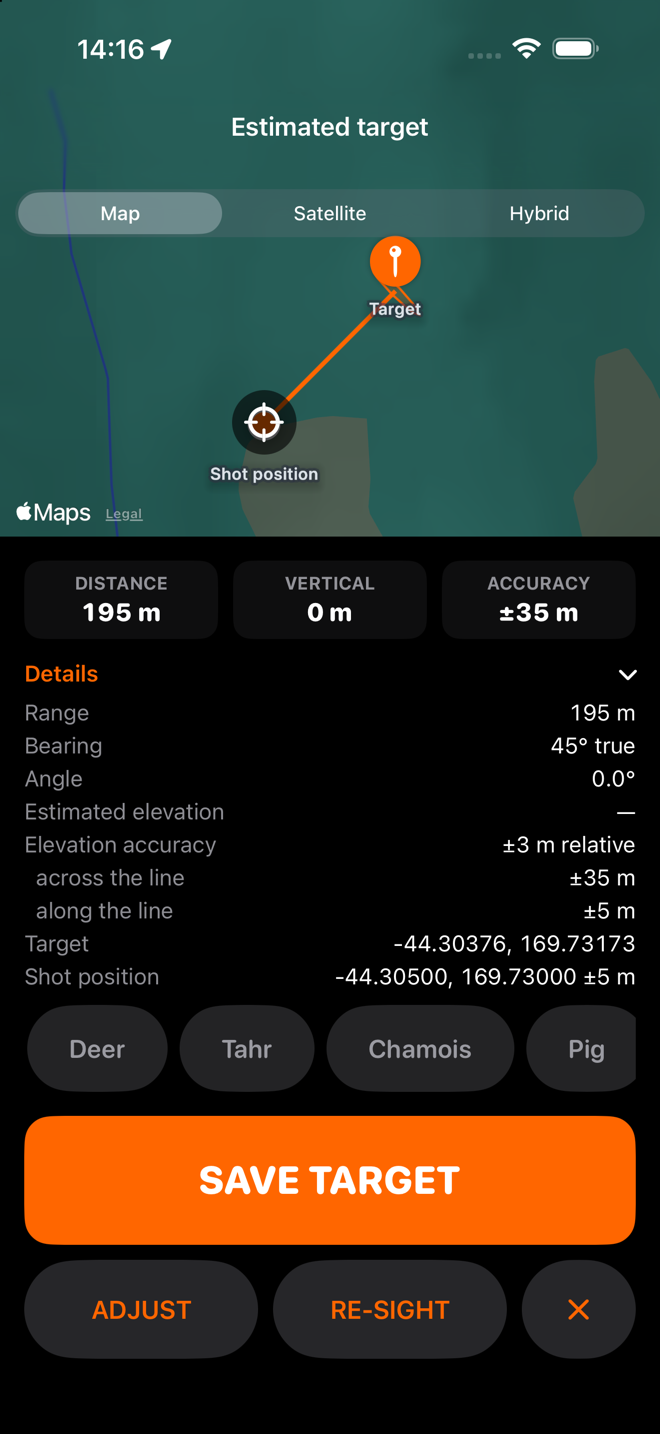
The whole working, if you want it
Everything that went in, everything that came out, and the likely zone split into its parts: ±66 m across the line and ±5 m along it. Nothing here is behind a paywall.
Note the fourth row. Estimated elevation: —. The device had no altitude it was willing to stand behind for the observer, so the app refuses to invent one for the target. It gives the height difference instead, which it does know, and says so. That dash is the app working correctly.
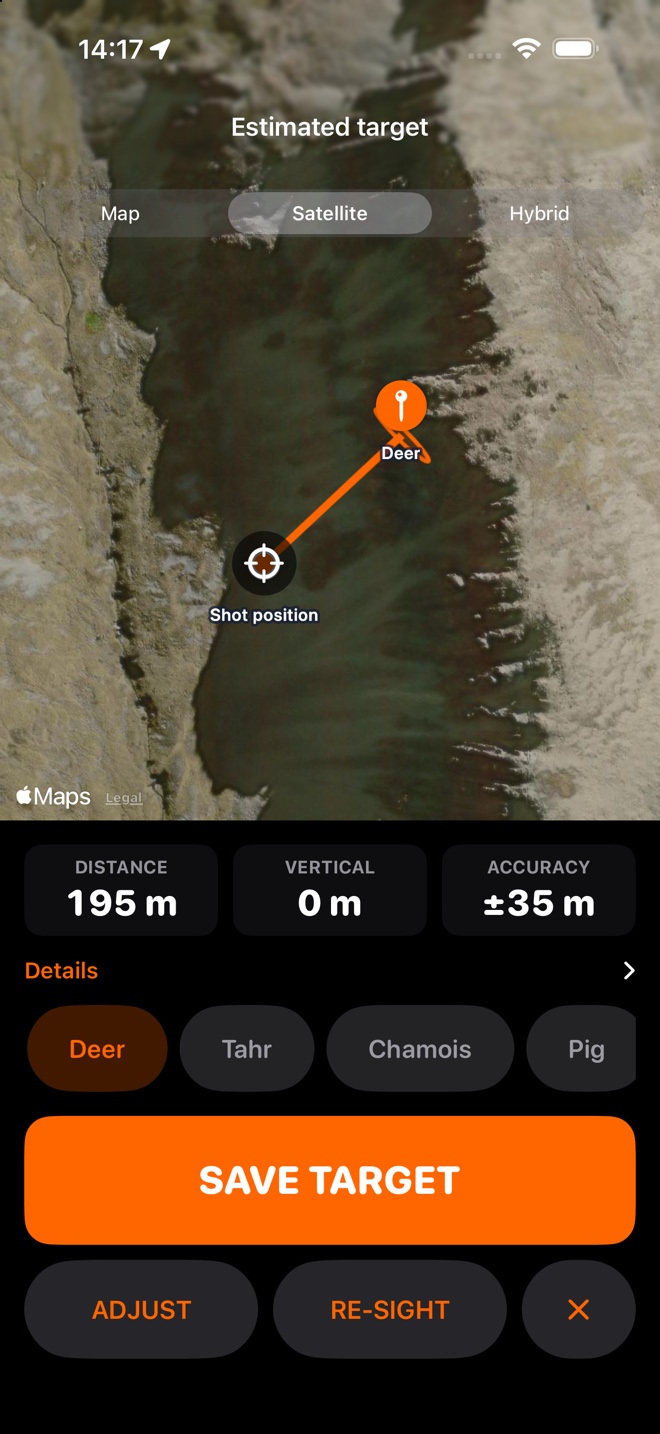
Satellite, and a name
Map, Satellite or Hybrid. Satellite is usually the one that tells a hunter something: you can see the scrub line, the slip, the creek you are going to have to cross.
A quick label — Deer, Tahr, Chamois, Pig — takes one tap and names the pin. It is optional, and so is everything else on this screen. SAVE TARGET is the only thing you have to press.
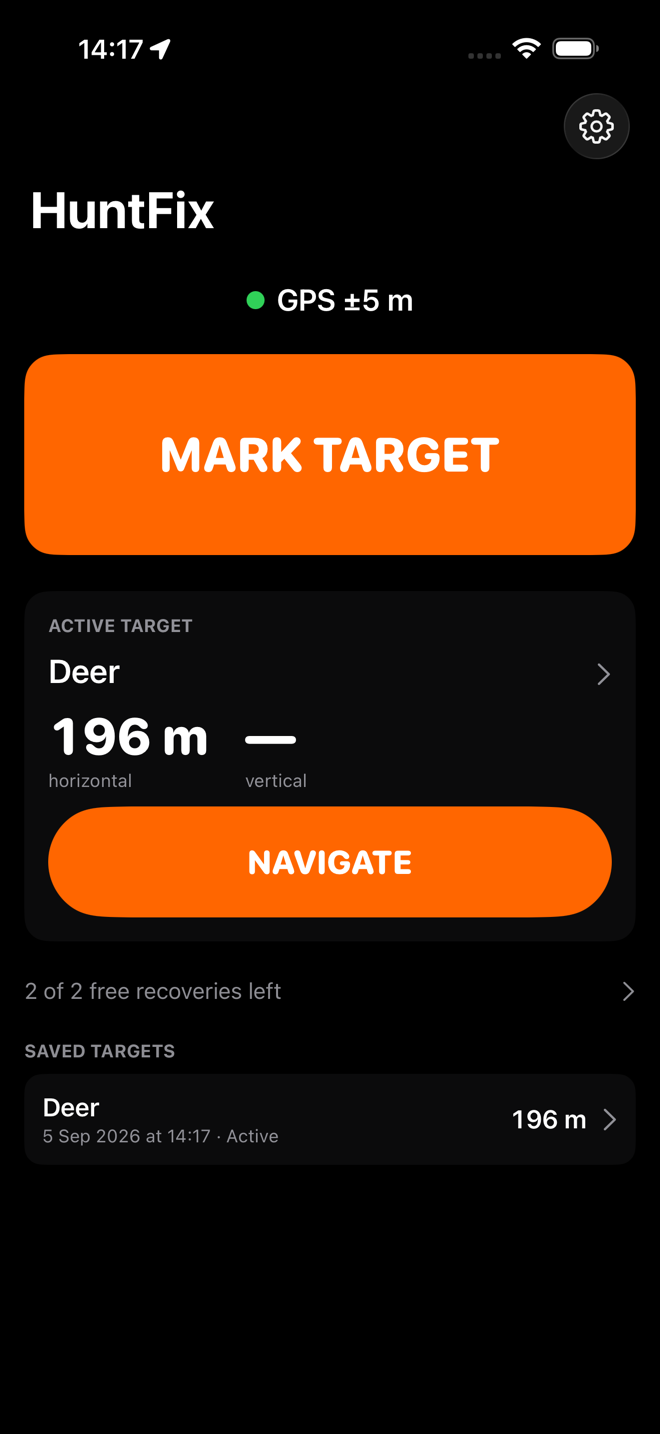
Saved, and now live
Back on the home screen the target is the active one, with the distance from where you stand updating as you move. The vertical shows a dash for the same reason as before: an altitude the phone never had cannot become one it has.
Everything above this point took a few seconds. Everything after it takes as long as the valley takes.
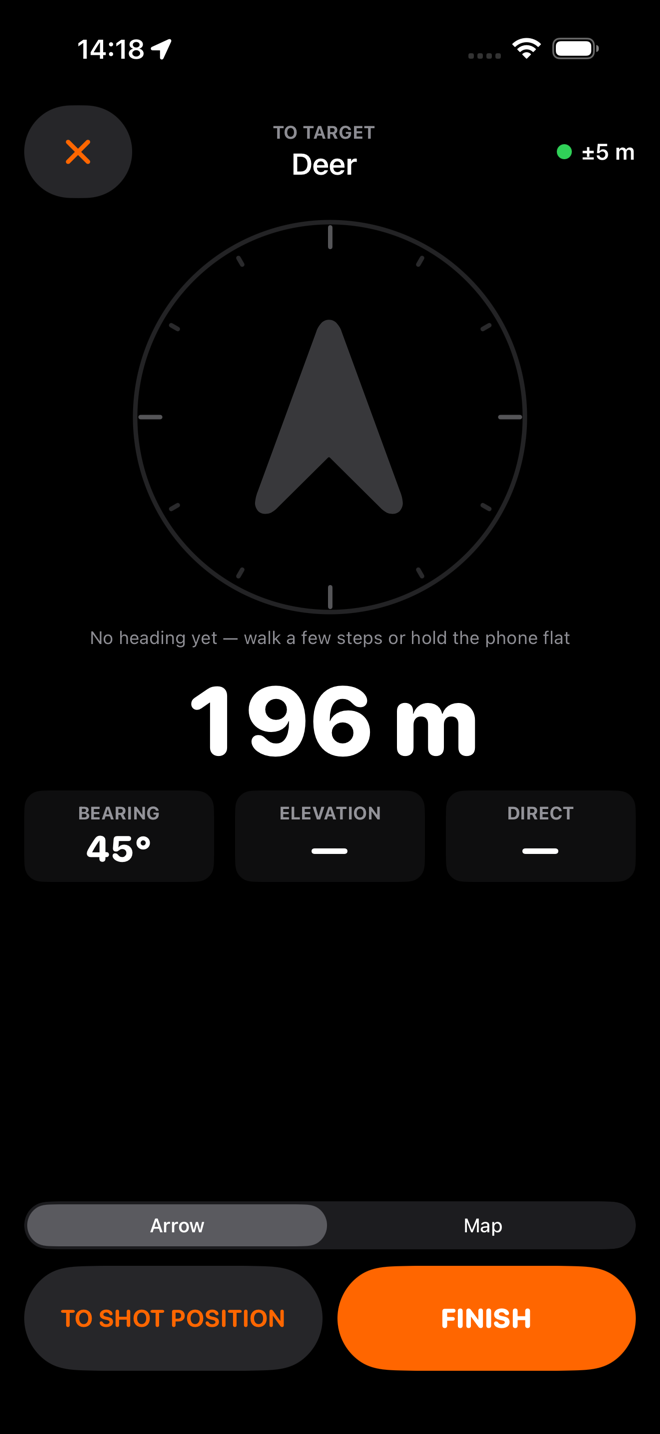
Navigate — and an arrow that admits it
The first thing this screen does is tell you it does not know which way you are facing yet. The arrow is grey and the line underneath says no heading yet — walk a few steps or hold the phone flat.
It would have been easy to point it somewhere. An arrow that points confidently at nothing is worse than no arrow, because you will follow it.
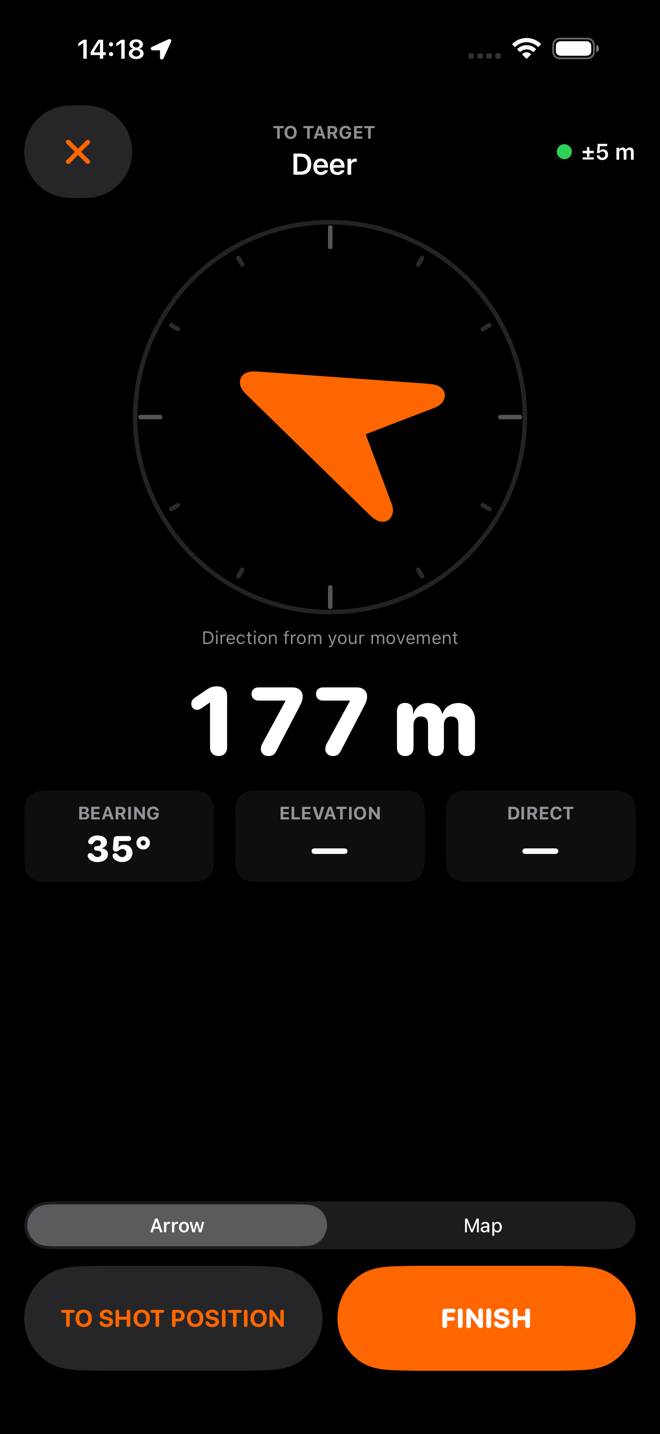
Moving
A few steps in, the arrow turns orange and the note changes to direction from your movement. Once you are walking, your GPS course is a better heading than a magnetic compass held in a swinging hand; when you stop, it goes back to the compass. The screen always tells you which one it is using.
The distance is the big number because the distance is what you are managing. Bearing, elevation difference and direct distance sit under it in smaller tiles.
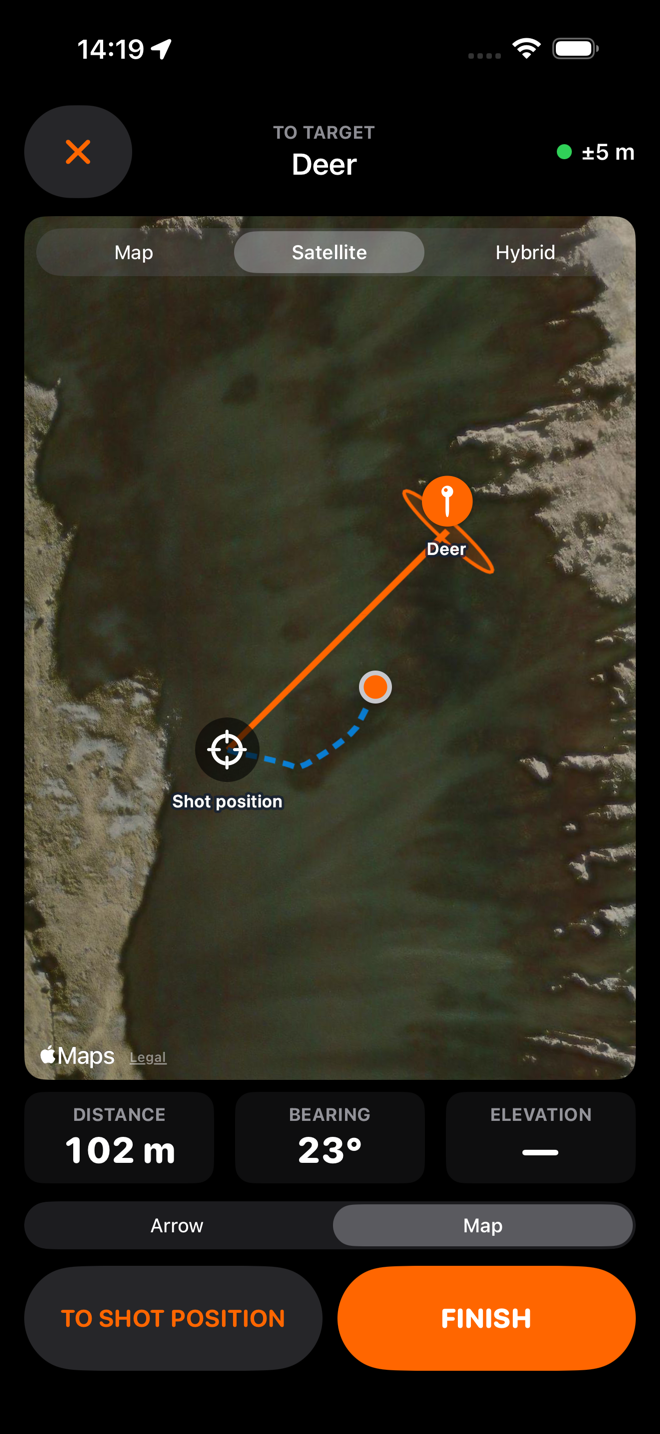
The map, when you want it
Same screen, other tab. Your shot position, the route you have actually walked as a dashed trail, where you are now, and the target inside its uncertainty ellipse.
The trail is the part people underrate until the light goes. It is recorded every five metres or so while this screen is open, and it is the fastest way back out with weight on your back.
If the tiles never load, everything above is still drawn, because HuntFix draws it. The map is a convenience, never a dependency.
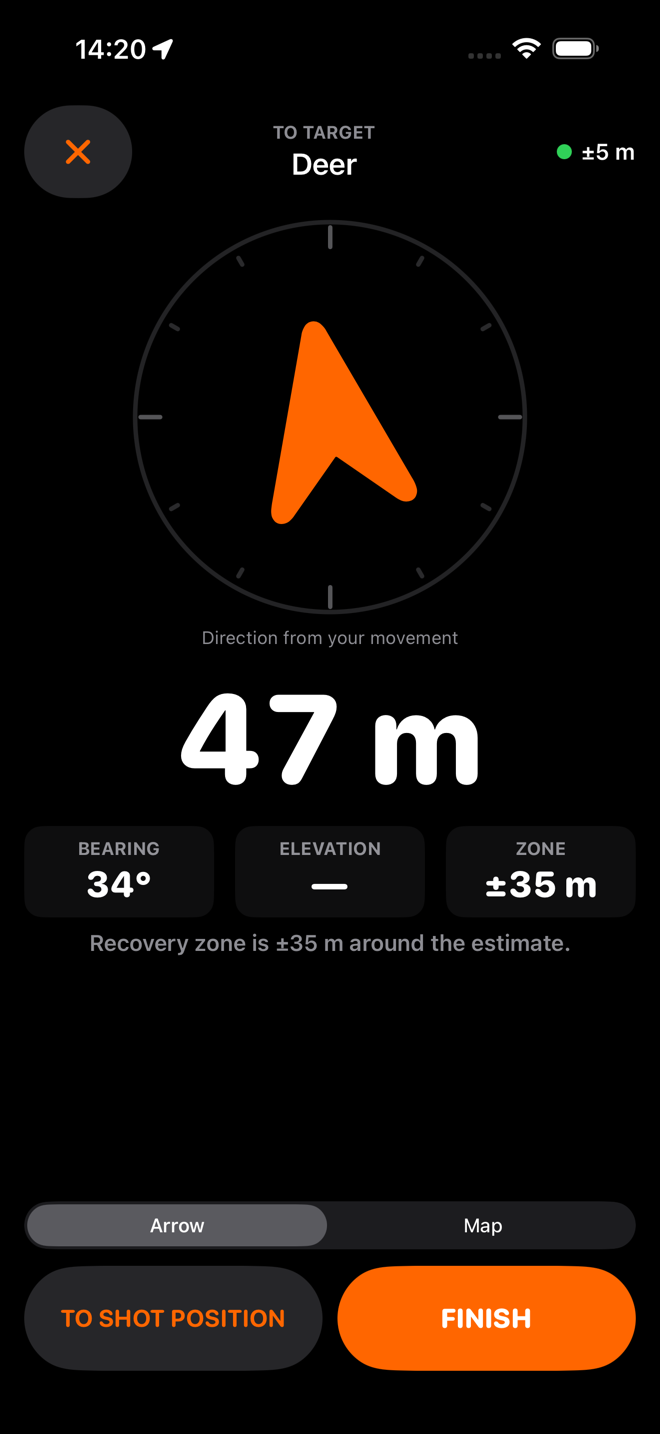
Near-target mode
Inside a hundred metres the display changes. The distance gets bigger, and the third tile stops being the direct 3D distance and becomes the zone — the radius of the area you should actually be searching, which is your target's uncertainty combined with the accuracy of your current fix.
And then the line that is the whole point of the app being honest: you are inside the likely zone. Search from here, and widen if it is not here. Not "you have arrived". The app does not know where the animal is. It knows where it calculated the animal to be and how wrong that could be, and it tells you both.
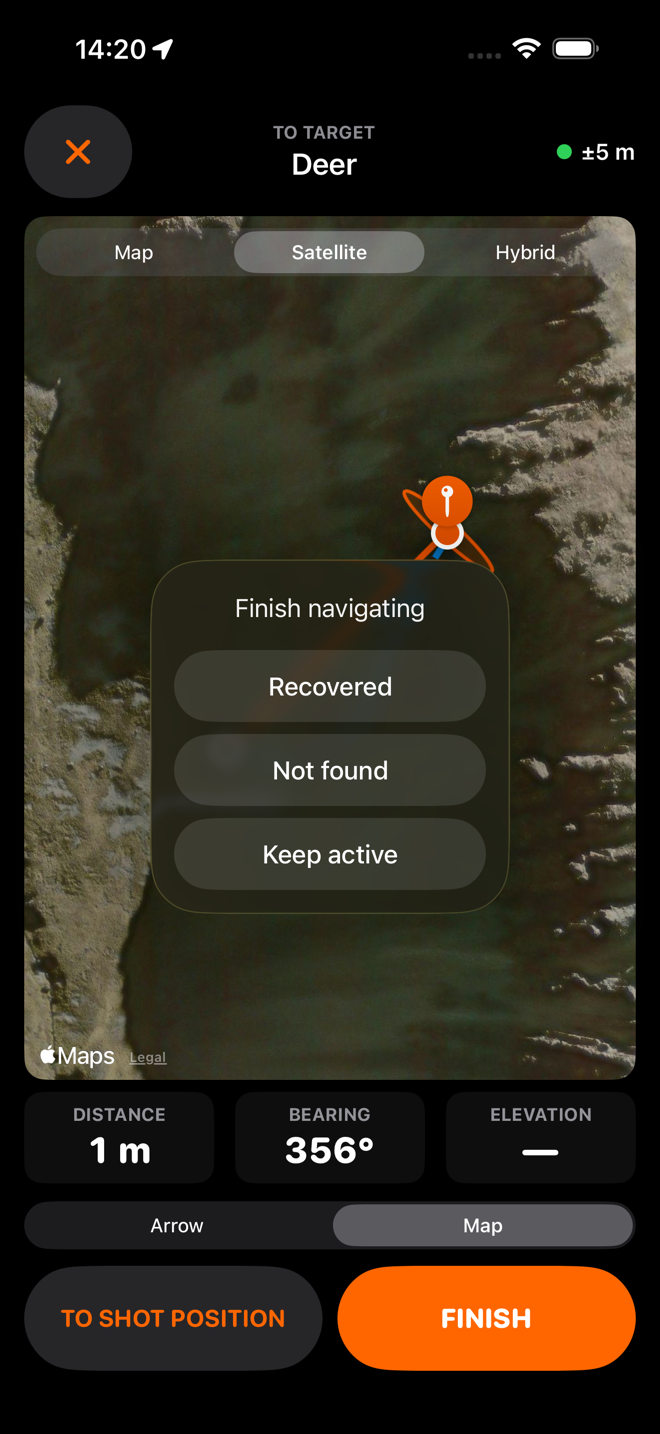
Finish
Recovered, Not found, or keep it active and come back tomorrow. It is a record of how the hunt went, nothing more: both outcomes cost the same, so there is nothing to gain by reporting one instead of the other.
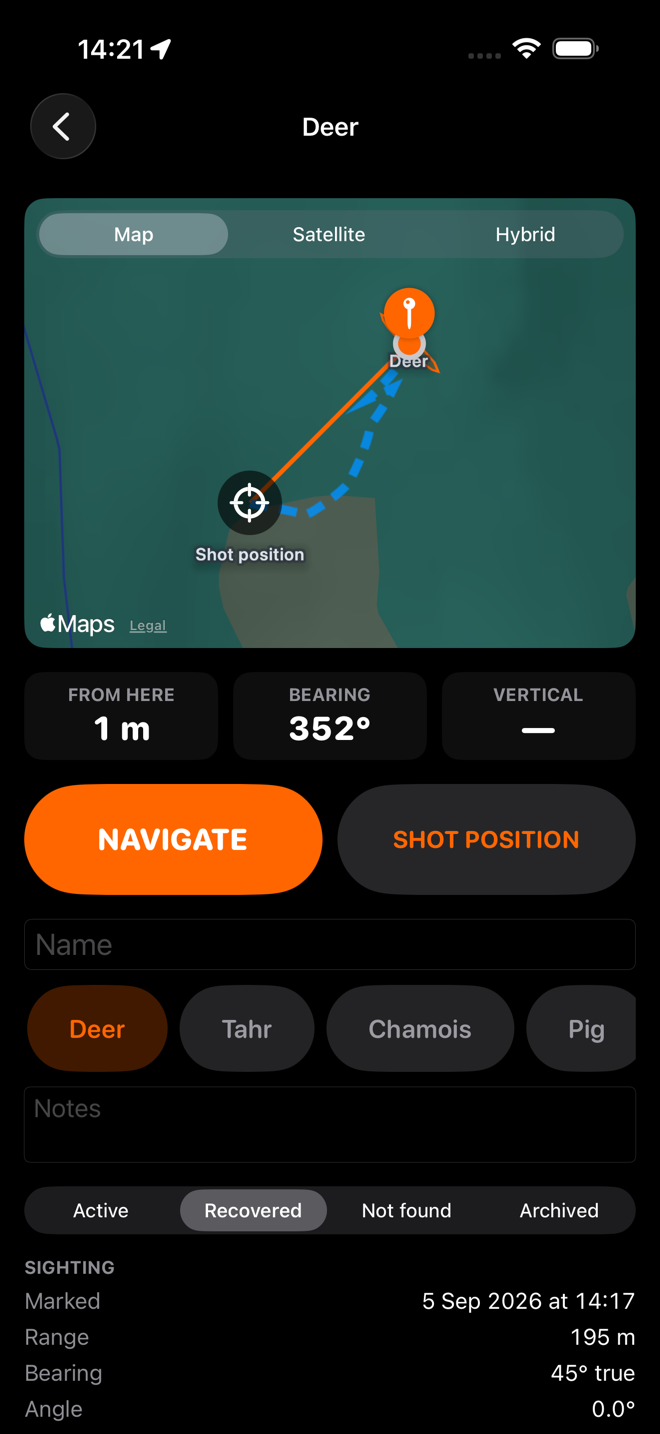
The target, afterwards
Every target keeps its whole story. Navigate to it again, or to the place you took the shot from. Name it, label it, add notes, change its status.
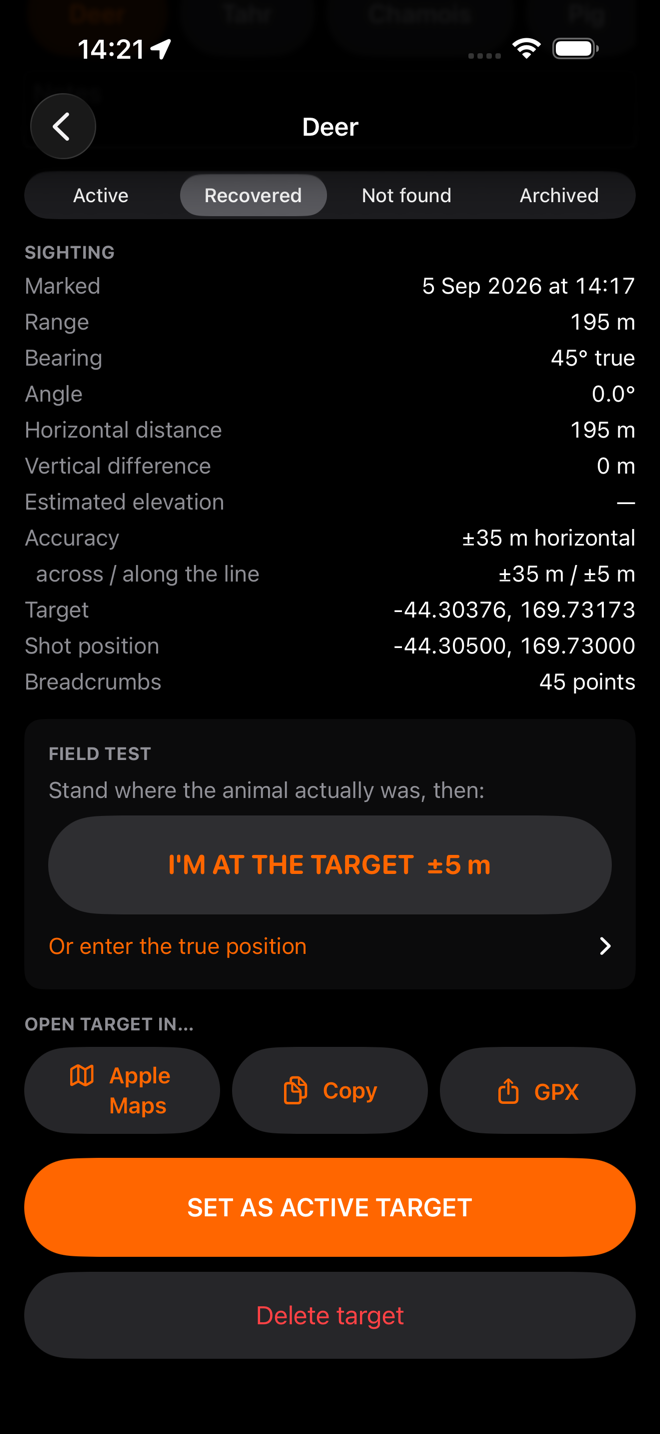
And the whole record under it
The sighting exactly as measured, the likely-zone breakdown, both coordinates and the length of the trail. Then the exports — Apple Maps, copy the coordinates, or a GPX file with the target, the shot position and the track in it.
The field test block is how the app is held to account. With the field-test tools turned on in Settings → Field testing, stand where the animal actually was, tap I'm at the target, and HuntFix works out how far the estimate missed by, and how much of that came from bearing, distance, angle and height. Do that enough times and "how accurate is it?" stops being an opinion.
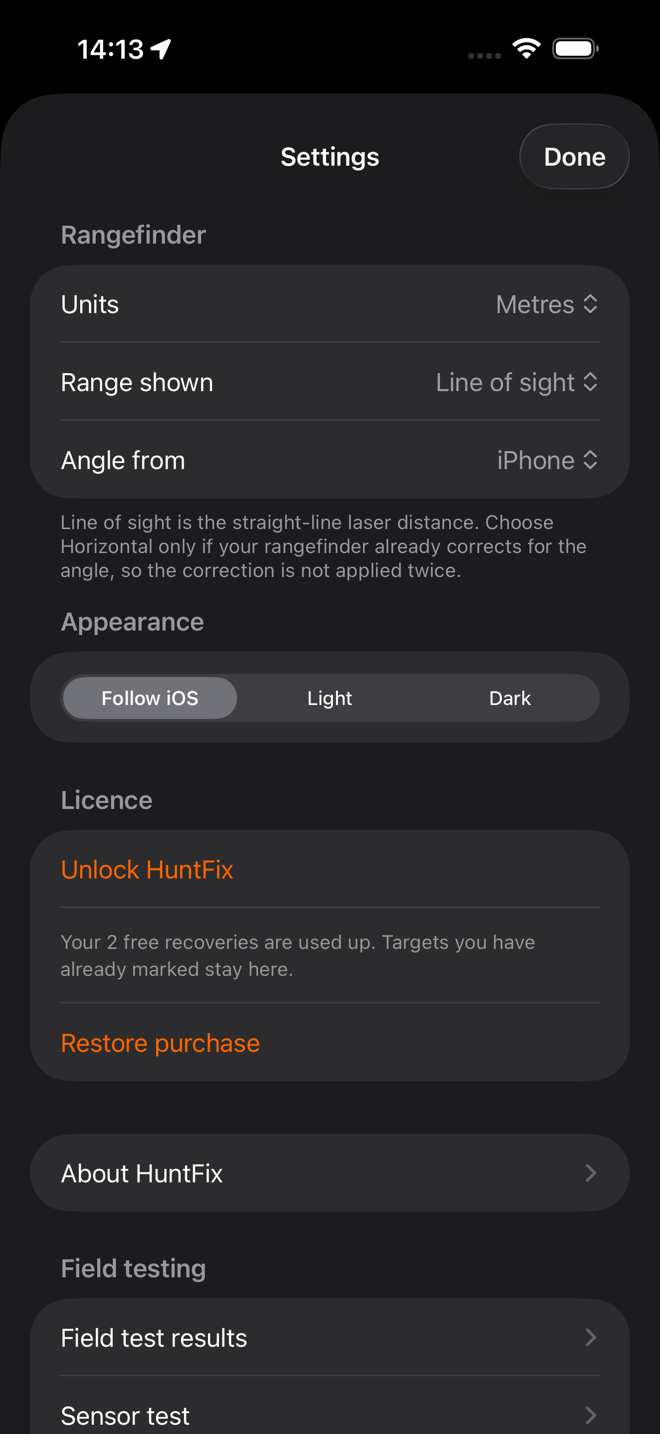
Settings
Metres or yards. Line of sight or horizontal. Angle from the phone, the rangefinder or by hand — with the plain-language note about not correcting twice. Light, dark or follow iOS.
Set once, and then forgotten, which is why it lives behind a gear rather than on the home screen.
It is also where the iCloud backup lives: whether you are signed in, when the last backup finished, a switch to stop it, and a button that deletes the iCloud copy outright.
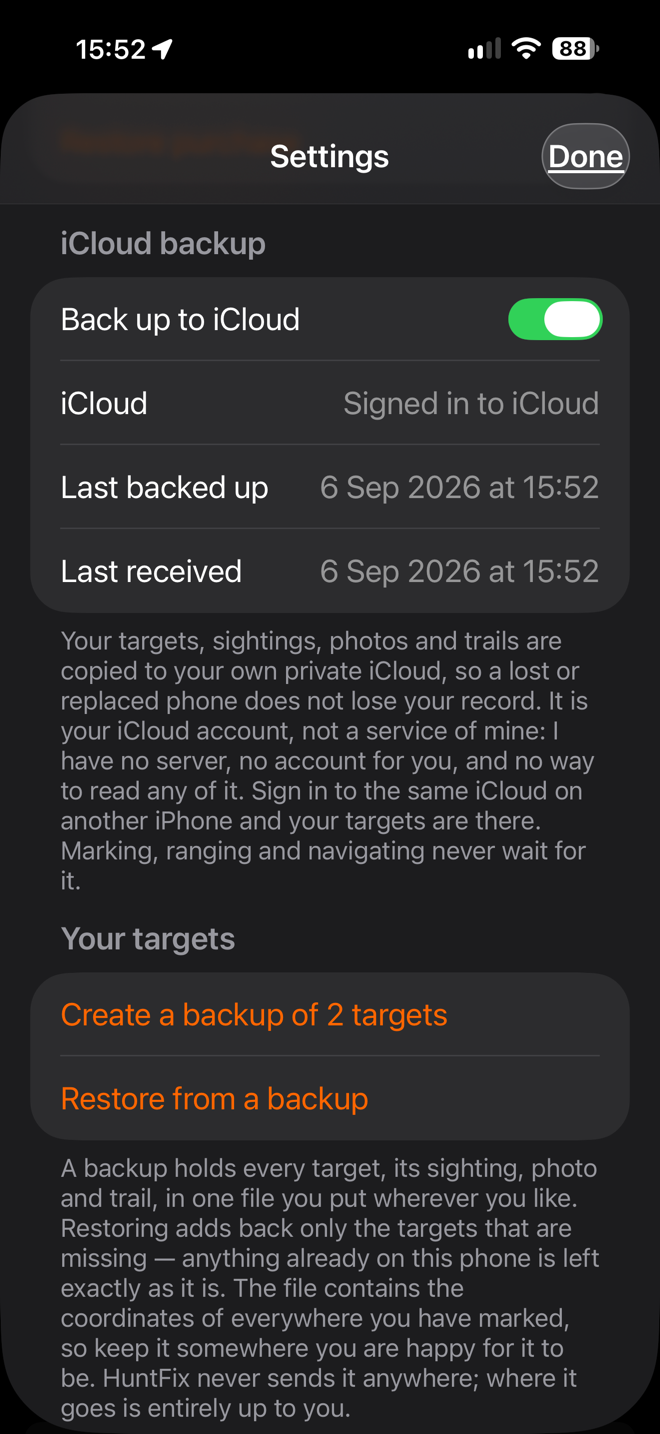
The backup, said plainly
The screen does not tell you it is backing up because a switch is on. It tells you whether you are signed in to iCloud, and the time the last backup actually finished — or a dash, if there has not been one yet. The same rule as everything else in the app: report what happened, not what was meant to.
The switch stops it, and once it is off the same screen offers to delete the iCloud copy outright. Nothing on your phone is touched either way.
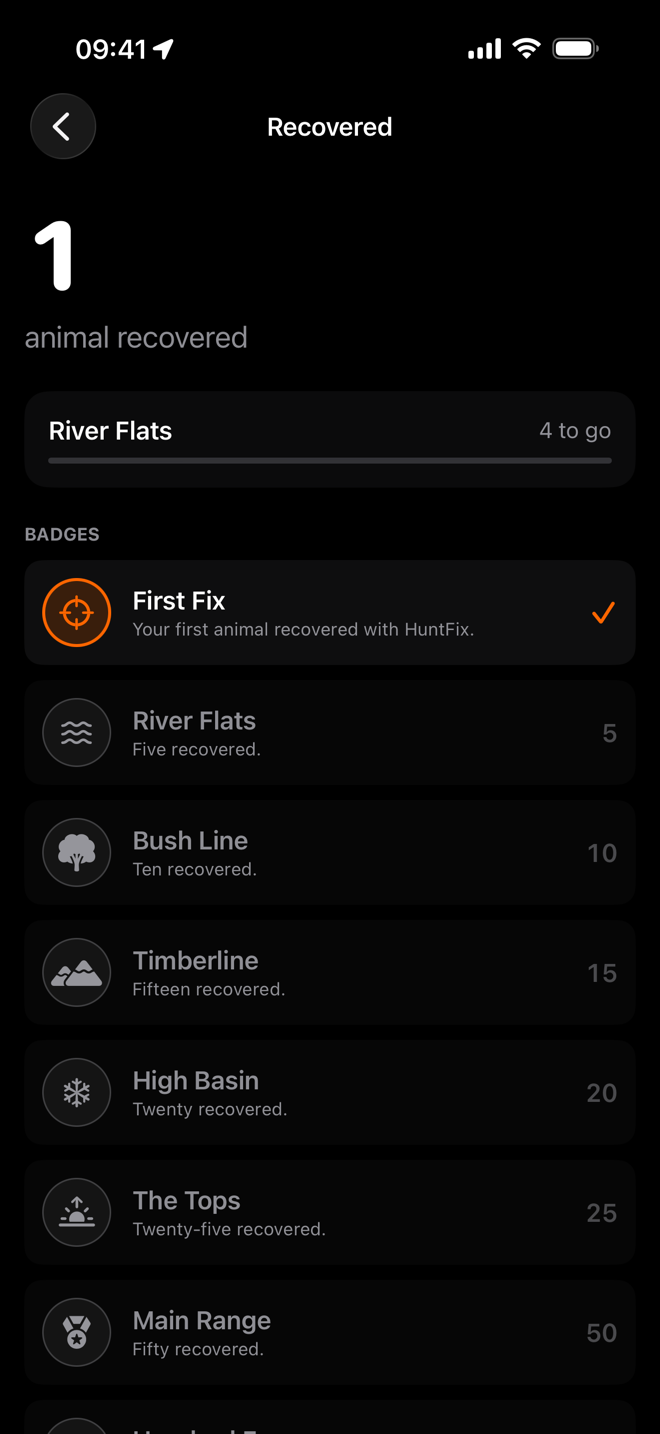
What you have recovered
Every animal you mark Recovered counts, with a badge at 1, 5, 10, 15, 20, 25, 50 and 100 — First Fix, River Flats, Bush Line, Timberline, High Basin, The Tops, Main Range, Hundred Faces.
The number is simply your saved targets marked Recovered, counted up. HuntFix has no way of knowing whether you actually found the animal — only that you tapped the button on the hill — and the screen says so. It is your record of your own hunting, which is why deleting a target takes its recovery with it, and why the count follows your iCloud backup to a new phone.
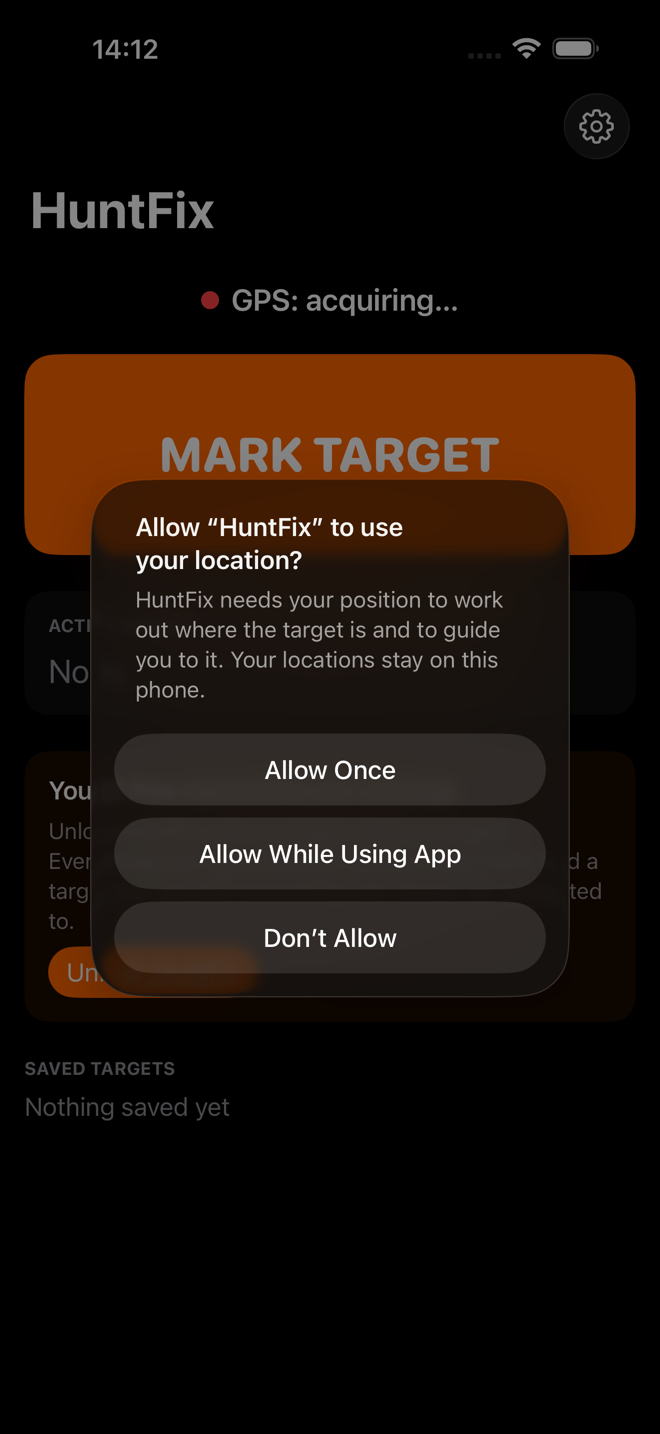
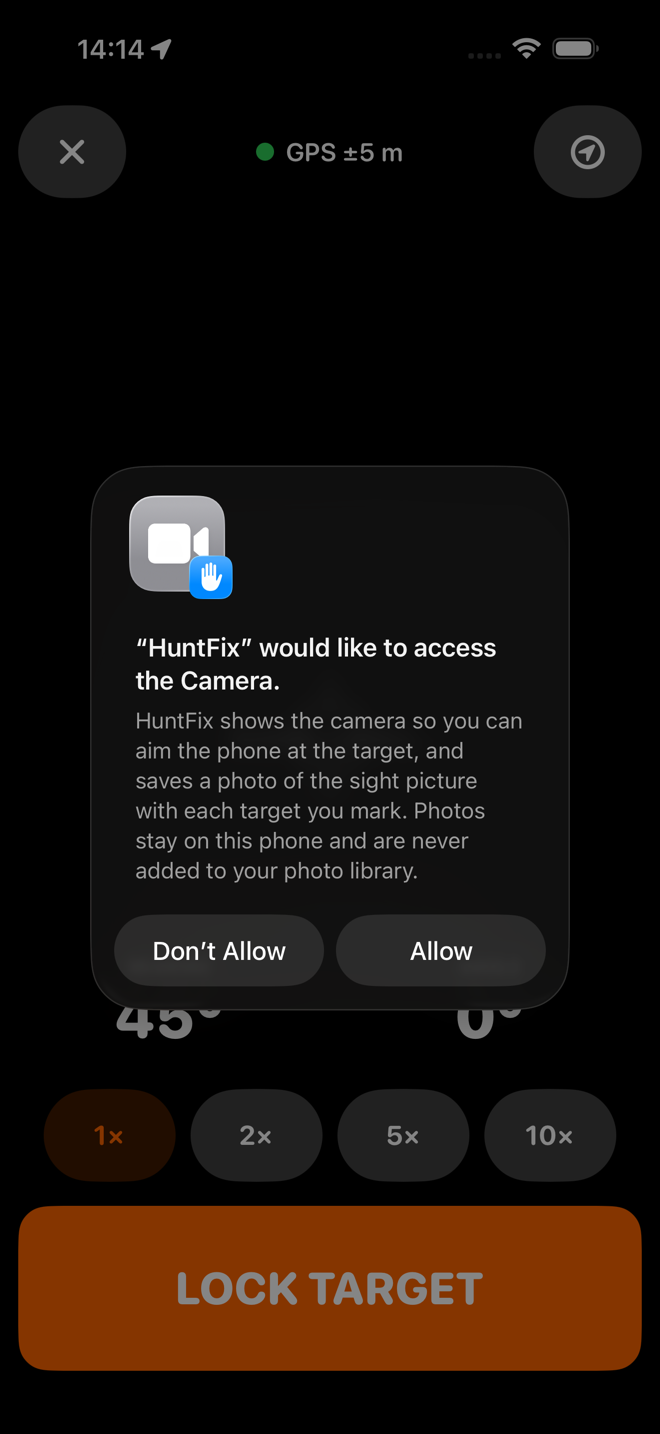
Two permissions, and what they are for